How to use TextureProcessing module
Use TextureProcessComponent to precess images.
TextureProcessComponent is a component for converting a UTexture image into a byte array of a specified size, as well as scaling, cropping, and rotating the image.
The resulting byte array can be used as input data to AI.
An example can be found in Content\NNEngineDemo\MotionCapture_Bp\MotionCapture_BpImplementation.uasset of the demo project.
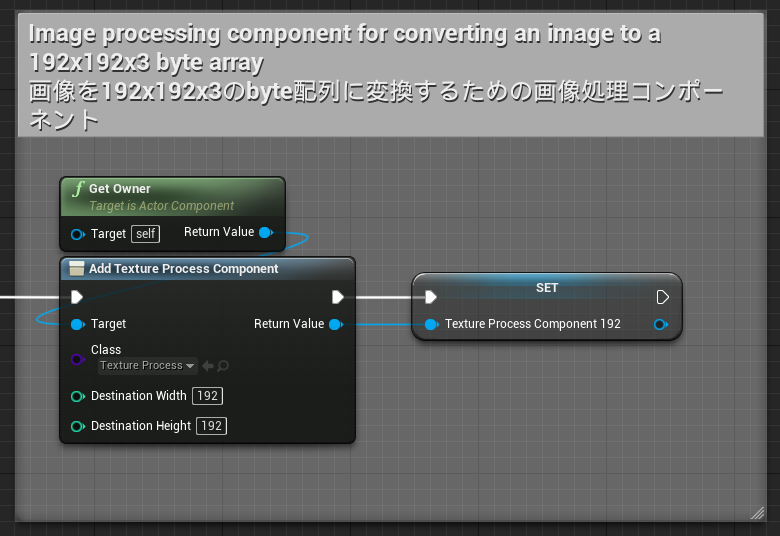
Create component
- Create a Blueprint class and add
TextureProcessComponent. - Specify the image size after image processing as the initial values of Destination Width and Destination Height.
ThisTextureProcessComponentwill output the result to a byte array with a size of (Destination Height x Destination Width x 3).
To use float array
Use TextureProcessFloatComponent which outputs results into a float array.
Simple Scaling
You can scale an image to the size specified at initialization by calling the Resize node of TextureProcessComponent.
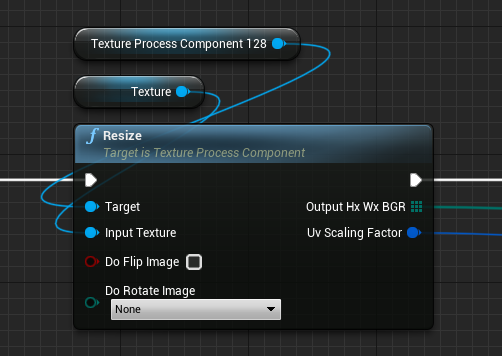
Input
Input texture: Original image.Do Flip Image: Whether to flip the image during resizing.Do Rotate Image: Whether to rotate the image during resizing.
Output
-
outputHxWxBGR:
An array of BGR values of each pixel of the image resized to (Destination Height x Destination Width), while keeping the aspect ratio. If the input and output images have different aspect ratios, part of the output array will be filled with some values. -
uvScalingFactor:
The ratio of the aspect ratios of input and output images. By multiplying the UV coordinates in the output image by this value, you can get the UV coordinates in the input image. For example, if the input image is 16:9 and the output image is square, the uvScalingFactor will be (1, 1.777…).
Affine transform
By calling the Affine Transform node of TextureProcessComponent, you can transform the input image and then scale it to the size specified at initialization.
See a linear algebra textbook for affine transformation itself.
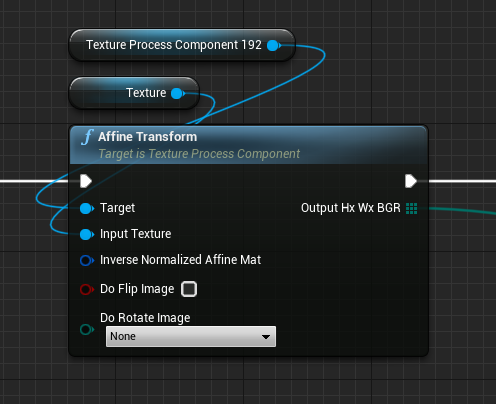
Input
Input texture: Original image.Inverse Normalized Affine Mat:
Specifies the inverse of the matrix which represents the affine transformation when the input / output image size is (1, 1). This is equal to the matrix which represents the affine transformation in UV coordinates.Do Flip Image: Whether to flip the image during resizing.Do Rotate Image: Whether to rotate the image during resizing.
Output
outputHxWxBGR:
An array of BGR values of each pixel of the image after transformation and resizing to (Destination Height x Destination Width).
Function to find the Affine transformation matrix 1
By calling the Get Inverse Affine Mat node, you can find the inverse matrix of the matrix that represents the affine transformation that crops an image to an arbitrary square area.
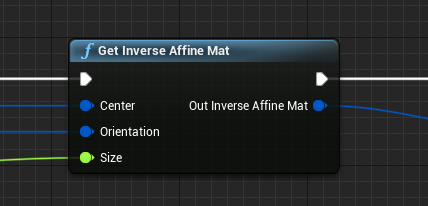
Input
Center: The center of the square area in the coordinate of the input image.Orientation: The orientation of the Y-axis of the square area in the coordinate of the input image. For example, (0, 1) when there is no rotation, and (-1, 0) when rotating 90 degrees clockwise.Size: The length of the side of the square area in the coordinate of the input image.
Output
Out Inverse Affine Mat: Inverse matrix of the matrix representing the obtained affine transformation
Function to find the Affine transformation matrix 2
By calling the Get Inverse Affine Mat From 2 Points node, you can find the inverse matrix of the matrix that represents the affine transformation that crops an image to an arbitrary square area.
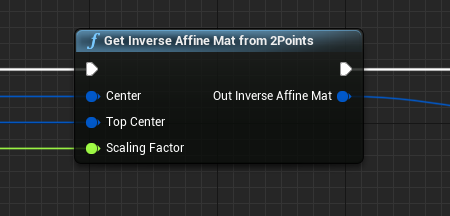
Input
Center: The center of the square area in the coordinate of the input image.Top Center: The center of the top edge of the square area in the coordinate of the input image.Scaling Factor:
Parameter for adjusting the size of the square area. The side of the square area will be (The distance between Center and Top Center * 2 * this value).
Output
Out Inverse Affine Mat: Inverse matrix of the matrix representing the obtained affine transformation
Create Texture from an array of bytes or floats
Create Texture2D objects
Call CreateTexture2d_xxx_yyy nodes to create Texture2D objects.
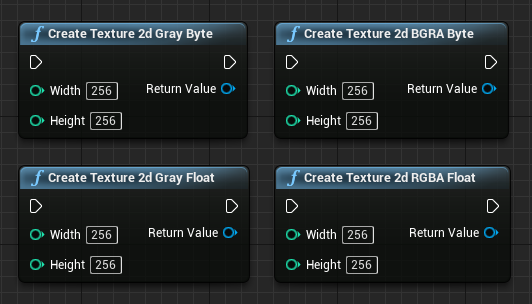
CreateTexture2d_Gray_Byte: Create Texture2D with one color channel. Each pixel has a uint8 value.CreateTexture2d_Gray_Float: Create Texture2D with one color channel. Each pixel has a float32 value.CreateTexture2d_BGRA_Byte: Create Texture2D with 4(BGRA) color channel. Each pixel has 4 uint8 values.CreateTexture2d_RGBA_Float: Create Texture2D with 4(RGBA) color channel. Each pixel has 4 float32 values.
Copy data from an array to Texture2D objects
Call CopyByteArrayToTexture2D_zzz nodes to copy data from the array to Texture2D.
Warning
The size of the input array must be equal to the number of the pixel of output texture.

CopyByteArrayToTexture2D: Copy the data of a byte array to a Texture2D object.CopyFloatArrayToTexture2D: Copy the data of a float array to a Texture2D object.CopyByteArrayToTexture2D_RGB_To_BGRA: Copy the data of a byte array to a Texture2D object while converting RGB format to BGRA format.CopyFloatArrayToTexture2D_RGB_To_RGBA: Copy the data of a float array to a Texture2D object while converting RGB format to RGBA format.